

A beginner’s guide to starting API testing with Playwright JS
👋Hello technical folks ~
We’ve outlined the basics of moving from manual to automated testing in one of our previous articles and as most of us should know, there are several types of test automation — User Interfaces (UI), End-to-End (E2E), Application Programming Interfaces (APIs), etc. For this article, we’ll cover the basics of API Testing using the Playwright Javascript framework. We hope that it will help those with little to no programming background to get started! 😊

What is API testing?
API Testing evaluates the functionality, reliability, performance, and security of each API. Within API testing itself, there’s also different types:
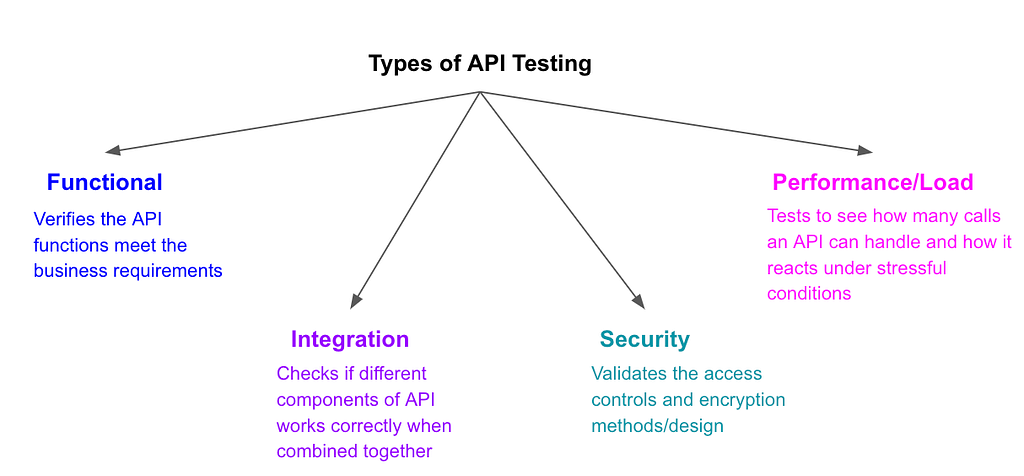
This article will focus on Functional API Testing. Before we proceed, do ensure that you have Playwright installed!
Setup for API Testing
The APIRequestContext
To call any API in Playwright, we will need to set up the APIRequestContext. This async class (read: Classes) is used to trigger any API endpoints, and it shares cookie storage with the browser via the APIRequestContext.
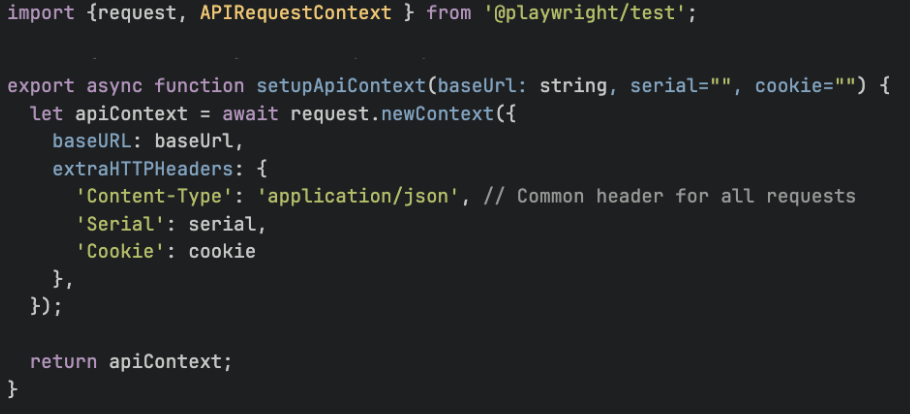
Since we need to set up the APIRequestContext for every API endpoint and there may be a lot of information to be included, we recommend creating a reusable helper function (read: Code Reusability) rather than having to duplicate the chunk of code all over the place.
The APIRequestContext methods
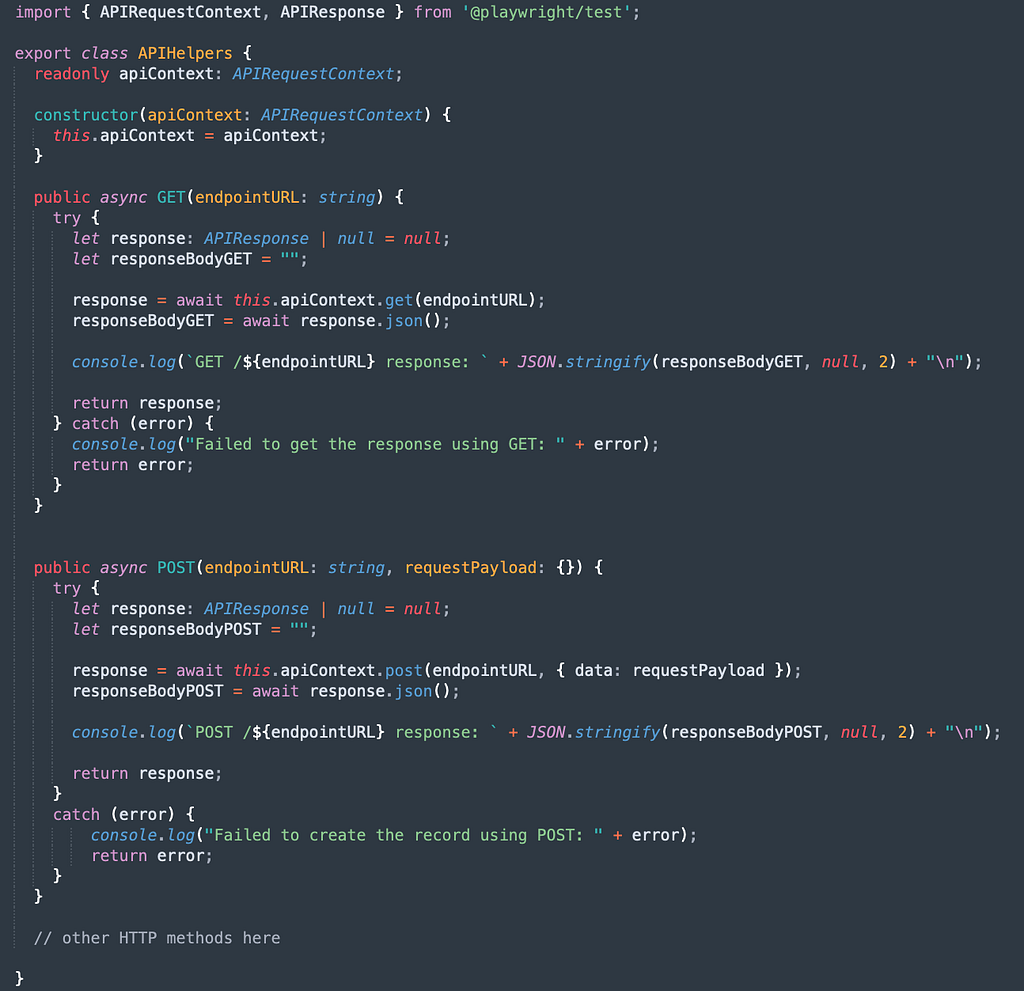
After creating and initialising the APIRequestContext class, let’s take a look at how to call its functions.

As we see above, the code for making an API call can be lengthy especially if we want to perform some checks and/or logging down each of the responses. For this, we may want to create wrapper functions for the APIRequestContext methods to hide all the nitty gritty details (read: OOP Encapsulation).
Of course if you’re not that confident in writing code yet, you may want to test to ensure your code is working (i.e. able to make the API call successfully) in the above format first before putting them into wrapper functions!
Now with the setup in place, let’s move on to the actual tests~
The Actual Tests
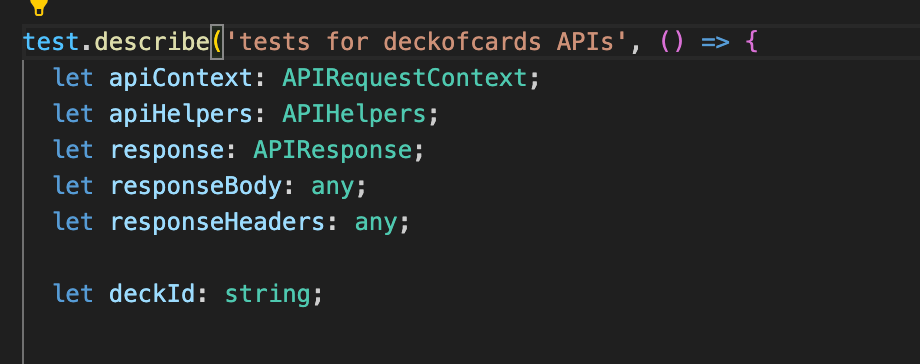
Ideally, all tests in a single file should be contained in a test.describe-block. We can also declare global variables that will be used in and/or changed by any of the tests along the way.
Writing the Tests
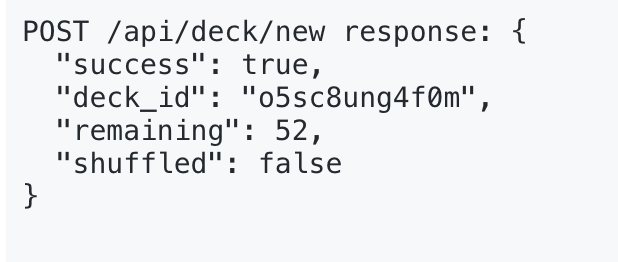
Supposed we want to call a POST /api/deck/new API that returns:
Using the wrapper functions above, we can do it like:
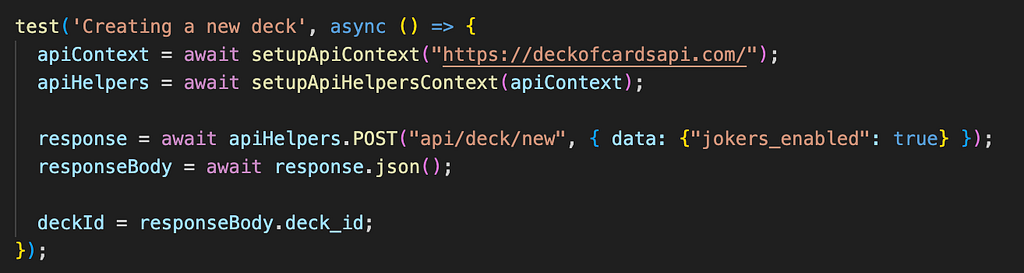
Since we’re testing the creation of a new deck, we have to, first, create the API context. We’ll do so by calling the wrapper function written previously, and passing in the base URL (http://deckofcardsapi.com). As this is an async function, we’ve to use the ‘await’ keyword to wait for the function to finish execution before proceeding to the next step.
After the API context has been created, we can now initialise the API helper and call its POST(…). The POST(…) takes in the API endpoint and the request payload. After we’ve called the API successfully, we will now parse the response body to JSON format.
Once we’ve parsed the response data into a JSON object, we can manipulate the object using standard Javascript syntax to assert our expected results on the data. Playwright provides plenty of assertions to choose from, allowing for full customisation of tests to any specific use case.

We will save the deck_id value into a ‘deckId’ variable for our next test!
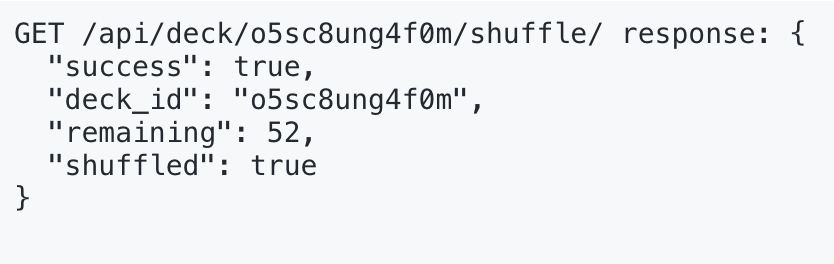
Supposed now we want to call a GET /api/deck/<>/shuffle API that returns:
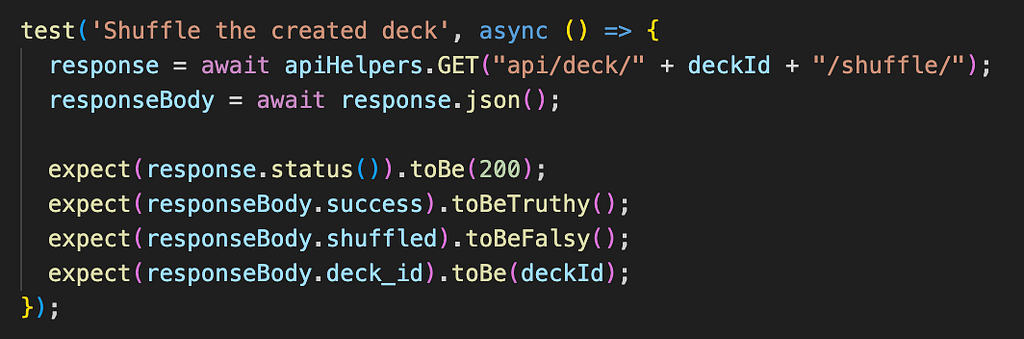
We can append any number of paths/parameters to the endpoint, simply by concatenating the strings.

In this case, the /deckofcards API documentation specifies that the deck_id must be in the middle of the path. Since parameters (like IDs) are subject to change, the best practice is to not hardcode them but instead, get the value from a previous test (i.e. using the deck_id from our previous test).
Just like with the previous POST API, we can have multiple assertions in the test, to check different parts of the response body.
Running the Tests
Once we’ve set up the tests with our assertions, we can proceed to run the tests to make sure everything works as expected! Playwright’s regular command for running tests is npx playwright test. There’s also ways to configure test files to run only a specific file if you have multiple types of tests (UI, API, E2E) in a single repository.
After the tests are run, an index.html (containing the test report) would be generated. The output folder for this file can also be customised using Playwright’s test reporters in a special configuration file. By default the Playwright test report in its most basic form is opened automatically, and we can see an overview of all the tests in our test file, and their statuses.
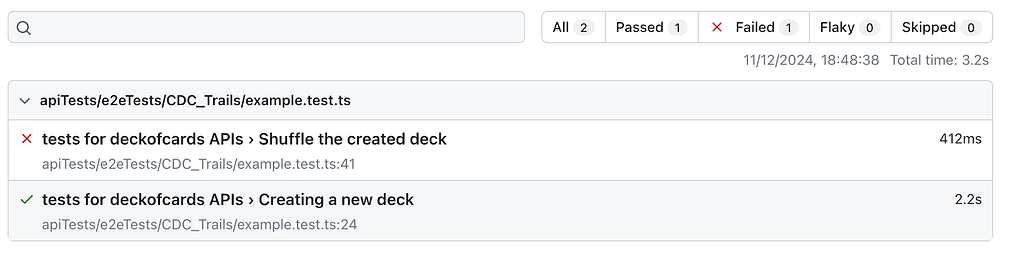
Analysing the Test Report
We can click into each individual test to see its execution steps, passed assertions, and failing assertions (if any). Taking the failed test for shuffling our deck as an example, we can see that 1 of the assertions is failing. Playwright also tells us why it fails, highlighting the expected vs the actual outcome of the test.
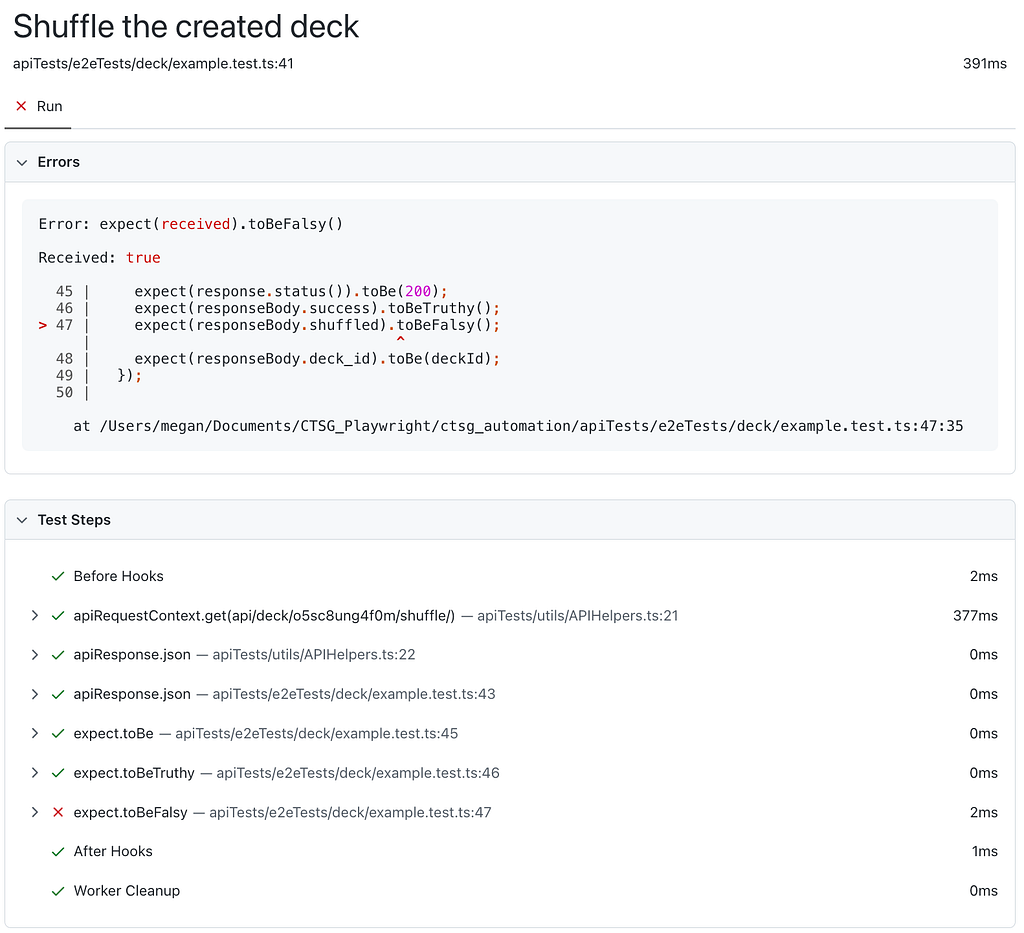
This visualisation is very useful when it comes to debugging failed tests, or even generating test reports to relevant stakeholders.
Another useful debugging method is to print the responseBody of each API call (scroll up to look closely at the wrapper functions!). The printout would be in the stdout section of the test report, inside each test.

This helps to visualise the response and why our tests are failing. Anything else that is printed in our test block will also be in this stdout section. But do try to minimise the content being printed out each time, as that affects runtime and resource consumption!
The tests in this article are very simple assertions based on a sample API. With the right understanding of Playwright’s fundamentals, and a solid foundation in Javascript, the possibilities are endless. These same basic steps can be repeated and built upon for much more thorough API functional, security, performance, integration testing, or even End-to-End testing.
We do encourage you to explore deeper into Playwright’s features and build your very own API testing framework! As always, continuous learning and hands-on practice is the key to mastering automated testing and achieving higher levels of quality standards in your products.
That’s the end of our last article for the year 2024. We wish you a Merry X’Mas and have a Happy New Year for 2025!
🧙🏼♀ Team Merlin 💛
Application security is not any individual’s problem but a shared responsibility.
A beginner’s guide to starting API testing with Playwright JS was originally published in Government Digital Products, Singapore on Medium, where people are continuing the conversation by highlighting and responding to this story.