

From Angular to React & Back, Part 2
Cross-Framework Testing with Micro-Frontends

In Part 1 of this 2-article series we went over the different level of tests, when testing an application built from a shell hosting micro-frontends developed using various frameworks (Angular & React). In this part we will reveal the testing infrastructures we used in those testing examples.
How is this Working? Helpers & Drivers 🪄
This seamless way of testing components, MFEs and applications is based on using test helpers , assertable and test drivers.

Test code uses the test driver, so that test code is unaware of the implementation details. Test Driver uses test helper, so it is unaware of the testing framework. Let’s focus on test helper, test drivers and assertable.
Why Test Helpers 🧞♂🧞♀️
Test Helpers are designed to decouple our tests from our testing framework. Theoretically, if we wish to switch our testing framework, all we have to do is implement a helper for the new testing framework, and all our tests will work.

Test Helpers expose three public properties: given, when, get, Wrapping most useful commands, so our tests are as decoupled as possible from our testing framework.
The given property holds methods which allow us to set pre-conditions before something takes place, like intercepting http responses and creating stubs.
The when property holds methods of “events” which will take place during the test like click, drug & drop, hover, etc.
The get property holds methods which will give our tests access to the “output” in a “black box” fashion, such as getting the color of a rendered html text element.
Helpers also steer us in the right direction in terms of test readability — forcing us to use the “given, when, get” terms in our tests. In this demo we are using CypressHelper, designed to be used in any test level, and holds common methods used in Cypress tests. We are also using CypressAngularComponentHelper & CypressReactComponentHelper which are designed to be used in component tests and are NOT framework agnostic, as they have to mount the component to the browser.
Assertable & then

The Assertable class wraps a subject we wish to assert something about, for example, assert that an element is disabled. Assertable wraps Cypress.Chainable so that our tests are as decoupled as possible from Cypress. By using the Assertable class, we can use the same assertions in our tests, regardless of the testing framework you use. All we need to do if we wish to replace Cypress with another testing framework and keep our tests, is to replace the implementation of the Assertable class. The cool thing about assertable is that you can also add assertions of your own, by extending the Assertable class.
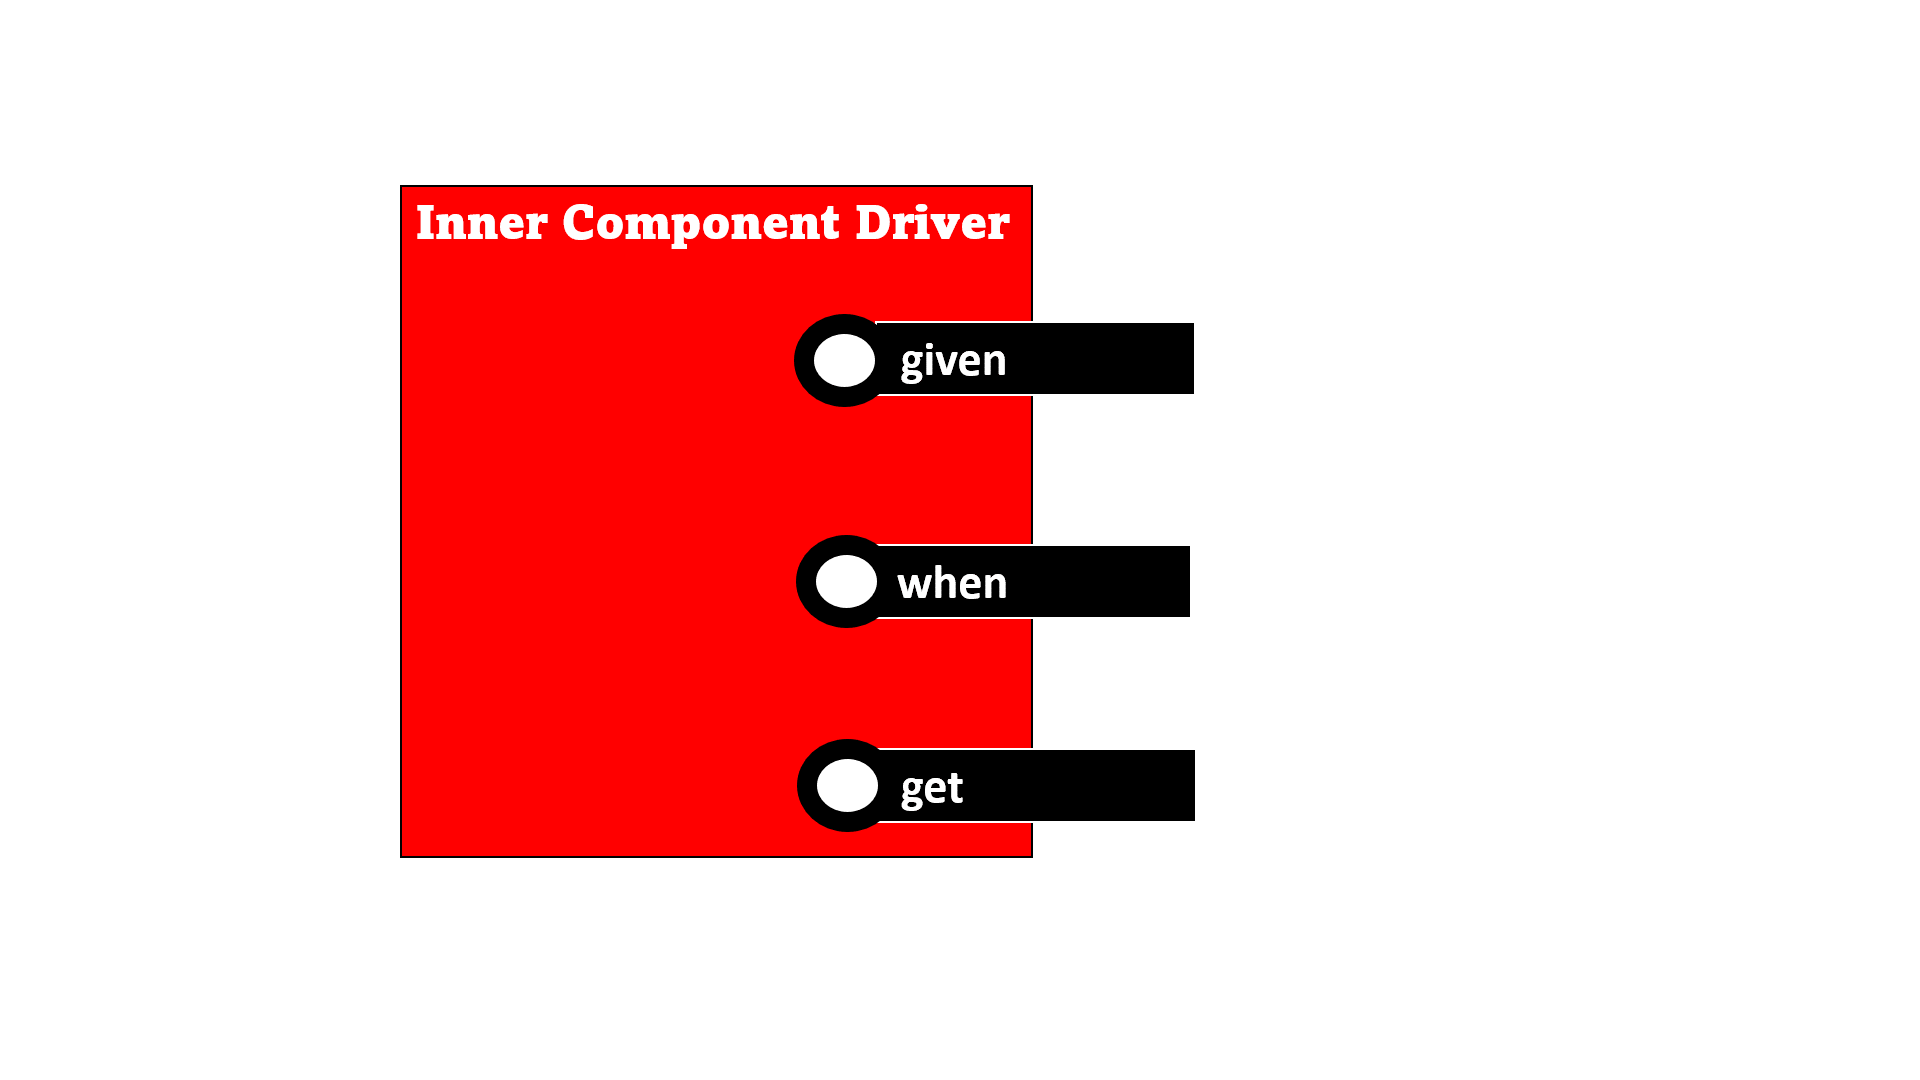
The Driver Pattern
Based on the Page Object Model from selenium, the driver pattern basically means that we have an additional class which is responsible for “bridging the gap” between our test file and our component. It will help our tests be unaware of the inner works of a component.
In addition, if we change something in the component which causes the test to fail, we will just have to amend the driver and our tests will pass again given the same logic applies.

Every Driver exposes three public properties: given, when and get.
The given property will hold methods which will allow us to set pre-conditions before something takes place. This is a classic place to have methods which will set the inputs which are going to be passed down to our component.
The when property will hold methods of “events” which will take place like render, click, hover, etc.
The get property will hold methods which will give our tests access to the “output” of the component in a “black box” fashion
Let’s see an example

The pokemon-image component displays an image, unless there is an error, then it shows a fallback image. Note, the data test id attributes will allow us to select those elements in the DOM during the tests.
What tests should we compose for this component?
We’ll have one test asserting the pokemon image is displayed given there is no error:


- Given an image source
- Given a mock image response
- When rendering the component
- Then image source should be equal to the input source
And a test asserting the fallback image is displayed, given that the image is not found:


- Given an image source
- Given failure to fetch image
- When rendering the component
- Then fallback image should be visible
Things to note here:
- We are using the driver’s Given, When & Get properties
- There are no control flows in the test code
- The test is readable & maintainable
- The test’s name indicates what went wrong in case the test fails
And this is what it looks like in action:

- One test showing test image from a test fixture
- One test showing the fallback image
What will the test driver look like?
export class PokemonImageComponentDriver {
  private helper = new CypressHelper();
  private reactComponentHelper = new CypressReactComponentHelper();
  private props: IProps = {
    name: undefined,
    src: '',
  };

  beforeAndAfter = () => {
      this.helper.beforeAndAfter();
    };
    given = {
      name: (value: string) => (this.props.name = value),
      src: (value: string) => (this.props.src = value),
      mockImageResponse: (fileName: string) =>
        this.helper.given.interceptAndMockResponse({
          url: '**/PokeAPI/sprites/master/sprites/pokemon/other/official-artwork/**',
          response: { fixture: fileName },
          alias: 'pokemonImage',
        }),
      missingImage: () =>
        this.helper.given.interceptAndMockResponse({
          url: '**/PokeAPI/sprites/master/sprites/pokemon/other/official-artwork/**',
          response: { statusCode: 404 },
          alias: 'pokemonMissingImage',
        }),
    };
    when = {
      render: (
        type: typeof PokemonImage,
        props?: (Attributes & Partial) | null,
        ...children: ReactNode[]
      ) => {
        const mergedProps: Attributes & IProps = { ...this.props, ...props };
        this.reactComponentHelper.when.mount(type, mergedProps, children);
      },
    };
    get = {
      pictureSrc: () => this.helper.get.elementsAttribute('pokemon-image', 'src'),
      pokemonImage: () => this.helper.get.elementByTestId('pokemon-image'),
      fallbackImage: () =>
        this.helper.get.elementByTestId('pokemon-fallback-image'),
    };
  }
In the given section we have method to set the source of the image, and methods to intercept and mock the response of the image request
In the when section we have a method to mount the component to the browser
And in the get section we have methods to explore the DOM and the outcome
Note how the driver uses helper functions to implement the methods required to drive the test. Theoretically, if we switch to another testing framework, the change will be relatively easy, as we will implement a helper for the new testing framework, keeping the driver very similar to its current implementation.
Driver Composition
Test drivers can be composed to drive the test of a component composed of multiple sub-components, and we can eventually create a driver for an entire page in our application, made of many components.
This way, test drivers can be used as building blocks to compose more elaborated test drivers.
In our example, the pokemon-details driver will hold a pokemon-image driver and expose its methods. We do not want to repeat ourselves, we do not want to implement again the methods already implemented in the pokemon-image driver.

Let’s take a look at the code:

You can see that pokemon-details driver exposes the methods of the pokemon-image driver.
we have already implemented a method to get the image source of the pokemon-image, we do not wish to repeat ourselvs, this way if there is a change, we only have to make it in one place. (remember the login example?)
And same goes for the pokemon-attributes sub component driver — the pokemon-details driver, exposes the pokemon-attributes driver’s methods.
Integration Driver
Integration Driver will be composed from all relevant component drivers ,in our case, the pokemon-details component driver, and will contain integration test related methods in addition, for example: methods for navigation.

Note how most of the driver methods were already implement in the component driver.
And as shown before, these are the integration tests of the details MFE.

Note how we are accessing the methods from the sub components drivers in the test.
Application Driver
And this is the driver for the entire Pokédex application, shell and both MFEs, exposing the E2E drivers of each MFE, regardless of whether the MFE is implement using react or angular.

So we are using drivers as building blocks to create more elaborate test drivers using driver composition, so that eventually we have an application driver, to driver more elaborated test flows on the entire application.
Summary
- The driver pattern enables decoupling of tests code and production code, so our tests can be unaware of the implementation details and focus on output.
- Using test drivers & helpers improves tests readability and maintainability
- Test code uses the test driver, so that test code is unaware of the implementation details and assertable to achieve decoupling from the testing framework
- Test Driver uses test helper, so it is unaware of the testing framework
Resources
Happy Testing!